A photo of your product. A video of your process. A behind-the-scenes look at your team. These visuals tell your story in ways words alone cannot.
In today’s digital landscape, photography and video are not optional extras. They are essential tools for connecting with your audience, building trust, and standing out. But professional-looking visuals do not require a Hollywood budget. With the right techniques, you can create compelling photos and videos using what you already have.
This guide covers the fundamentals of photography and video for business: equipment options, lighting, composition, storytelling, and practical tips for creating content that resonates.
🎯 Why Photography and Video Matter
Visual content dominates the internet. People remember images better than text, and video generates the highest engagement across platforms.
| Reason | Why It Matters |
|---|---|
| Attention | Visuals stop the scroll; text alone often gets ignored |
| Trust | Real photos of your work build credibility; stock photos can feel generic |
| Connection | Video lets people see your face, hear your voice, and feel your personality |
| Clarity | A demonstration shows what words describe |
| Memory | People remember visual content longer than text |
💡 Your audience wants to see who you are, what you do, and why it matters. Photography and video make that possible.
📸 Equipment: You Probably Have Enough Already
Professional gear is nice, but not necessary. The best camera is the one you have with you.
What You Can Use
| Equipment | Pros | Cons |
|---|---|---|
| Smartphone | Always with you, easy to use, surprisingly capable | Limited zoom, smaller sensor |
| DSLR/Mirrorless | Excellent quality, interchangeable lenses, manual control | Expensive, bulky, learning curve |
| Action Camera | Durable, wide angle, good for movement | Limited versatility |
| Webcam | Good for video calls, consistent setup | Limited to desk setup |
💡 Start with your smartphone. Most modern phones produce excellent quality. Upgrade only when you hit clear limitations.
Essential Accessories (Optional but Helpful)
| Accessory | Purpose |
|---|---|
| Tripod | Steady shots, hands-free recording, consistent framing |
| Phone Mount | Attach your phone to a tripod or stand |
| External Microphone | Better audio quality for video |
| Portable Light | Improves lighting in any situation |
| Simple Background | Clean backdrop for product shots or interviews |
💡 If you buy one accessory, make it a tripod. Stability instantly improves photo and video quality.
💡 Lighting: The Most Important Factor
Lighting makes or breaks a photo or video. Good lighting can make a smartphone look professional. Bad lighting can make expensive gear look amateur.
Natural Light
Natural light is free and flattering. The key is using it correctly.
| Approach | How to Do It |
|---|---|
| Window Light | Position your subject facing a window. Avoid direct harsh sunlight. |
| Golden Hour | Shoot during the hour after sunrise or before sunset for warm, soft light |
| Overcast Day | Clouds act as a giant softbox; perfect for outdoor portraits |
| Shade | Open shade (under a tree, beside a building) provides even, flattering light |
💡 Avoid harsh midday sun. It creates unflattering shadows and makes people squint.
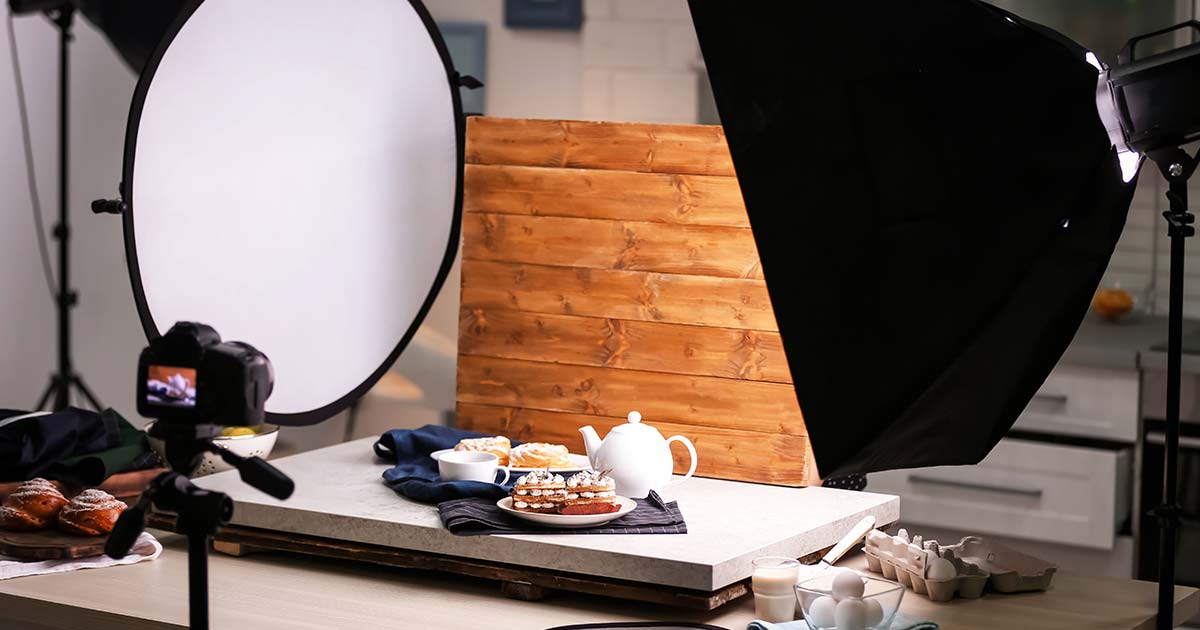
Artificial Light
When natural light is not enough, artificial light gives you control.
| Option | Best For |
|---|---|
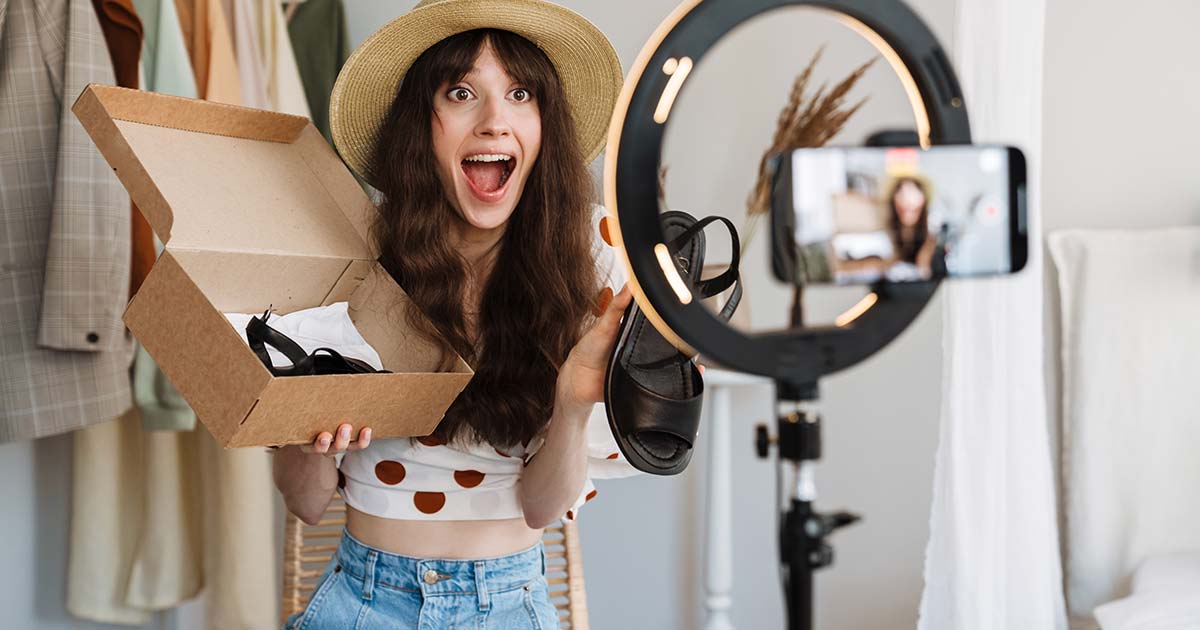
| Ring Light | Portraits, talking head videos, product shots |
| Softbox | Studio-style lighting, interviews, flat lays |
| LED Panel | Versatile, adjustable brightness and color |
| Desk Lamp | Budget-friendly; use with white lampshade or bounce off wall |
Basic Lighting Setups
| Setup | How to Do It |
|---|---|
| Front Light | Light source in front of subject; even but flat |
| Side Light | Light from 45-degree angle; adds depth and dimension |
| Back Light | Light behind subject; creates separation from background |
| Three-Point | Key light (main), fill light (softens shadows), back light (separates background) |
💡 For most business content, a single good light source positioned at a slight angle to your subject works perfectly.
🖼️ Composition: How to Frame Your Shots
Composition is how you arrange elements within your frame. Good composition guides the viewer’s eye and tells a clearer story.
The Rule of Thirds
Imagine your frame divided into a 3×3 grid. Place important elements along the lines or at the intersections, not dead center.
How to use it:
- Position eyes along the top horizontal line
- Place products at intersection points
- Align horizons with top or bottom grid line
💡 Most smartphones have a grid setting. Turn it on to help with composition.
Framing Techniques
| Technique | How to Do It |
|---|---|
| Leading Lines | Use lines (roads, fences, edges) to guide the eye to your subject |
| Symmetry | Balanced, mirror-like compositions feel formal and strong |
| Negative Space | Leave empty space around your subject for text or clean look |
| Fill the Frame | Get close; eliminate distractions |
| Different Angles | Shoot from above, below, or the side for variety |
Orientation
| Orientation | Best For |
|---|---|
| Horizontal (16:9) | Website banners, YouTube, desktop viewing |
| Vertical (9:16) | Instagram Stories, TikTok, Reels, mobile viewing |
| Square (1:1) | Instagram feed, LinkedIn, Facebook |
💡 Shoot with your final platform in mind. Vertical for mobile-first platforms; horizontal for desktop or YouTube.
📹 Video: Storytelling in Motion
Video combines visuals, audio, and movement to tell stories in powerful ways. You do not need to be a filmmaker to create effective video content.
Types of Business Videos
| Type | Purpose | Example |
|---|---|---|
| Introduction | Who you are and what you do | “Hi, I’m [name] and I help businesses…” |
| Tutorial | Teach something useful | “How to organize your inbox in 3 steps” |
| Behind the Scenes | Show your process | A day in the office, product being made |
| Customer Story | Social proof | Interview with a happy client |
| Product Demo | Show how it works | Unboxing, setup, features |
| FAQ | Answer common questions | “What is the most common mistake?” |
| Live Video | Real-time connection | Q&A, event coverage, announcements |
Video Essentials
| Element | Why It Matters |
|---|---|
| Audio | Bad audio ruins good video. Use an external microphone if possible. |
| Stability | Shaky footage looks unprofessional. Use a tripod or stabilize your phone. |
| Length | Keep it as short as possible. Attention spans are short. |
| First Few Seconds | Hook viewers immediately. Start with the most interesting part. |
| Call to Action | Tell viewers what to do next (follow, comment, visit website) |
Simple Video Setup
- Position your camera at eye level on a tripod
- Set up lighting facing you at a slight angle
- Check audio with headphones or test recording
- Frame yourself with eyes on top third line
- Look at the lens (not yourself on screen)
- Speak naturally like you are talking to a friend
💡 You do not need a script. Bullet points keep you on track without sounding rehearsed.
📱 Smartphone Photography Tips
Your phone is a powerful camera. Use it well.
| Tip | How to Do It |
|---|---|
| Clean Your Lens | Oils from fingers blur photos. Wipe before shooting. |
| Tap to Focus | Tell your phone what you want in focus |
| Adjust Exposure | Tap and slide up/down to brighten or darken |
| Use Portrait Mode | Creates background blur (bokeh) for professional look |
| Shoot in Good Light | Phone cameras struggle in low light |
| Hold Steady | Use both hands or a tripod |
| Edit Lightly | Small adjustments to brightness, contrast, and warmth go a long way |
💡 Shoot in the highest resolution your phone offers. You can always downsize later.
🎬 Editing: Polish Without Overdoing
Editing makes good content great. But over-editing can make it feel artificial.
Basic Editing Steps
- Crop to remove distractions and improve composition
- Adjust exposure to ensure proper brightness
- Correct color to make it look natural (not oversaturated)
- Add text if helpful for clarity
- Keep it short —cut unnecessary parts
Tools for Editing
| Tool | Best For | Free Option |
|---|---|---|
| Canva | Photos, quick video edits | Yes |
| Snapseed | Photo editing | Yes |
| CapCut | Video editing for social | Yes |
| Lightroom | Advanced photo editing | Limited free version |
| iMovie / Clipchamp | Basic video editing | Yes (depending on device) |
💡 Less is more. A clean, natural look beats heavy filters and excessive effects.
📋 Photography and Video Checklist
- ☐ I have identified what equipment I already have (smartphone, tripod, light)
- ☐ I understand how to use natural light effectively
- ☐ I know basic composition rules (rule of thirds, framing, orientation)
- ☐ I have a tripod or way to keep my camera steady
- ☐ I have considered audio quality for video (external mic, quiet space)
- ☐ I have planned the type of video that fits my purpose
- ☐ I know my editing tools and can make basic adjustments
- ☐ I have practiced shooting and editing before posting
📚 Useful Internal Links
- Content Creation: Writing, Visuals, Formats, Repurposing
- Social Media Marketing: A Practical Guide for Business
✅ Conclusion: Start Creating with What You Have
Professional-looking photography and video are within reach for any business. You do not need expensive gear. You need good lighting, thoughtful composition, and a willingness to practice.
- Start with your smartphone—it is more capable than you think
- Lighting matters more than equipment. Use natural light whenever possible
- Follow basic composition rules to frame your shots effectively
- For video, prioritize audio quality and stability
- Keep content short, hook viewers quickly, and end with a clear call to action
- Edit lightly. A clean, natural look builds trust
The best time to start creating visual content was yesterday. The second best time is today. Pick up your phone, find good light, and start telling your story.